
Tutorial on Creating Characters and Scenes with GPT Image 2 and Seedance 2.0
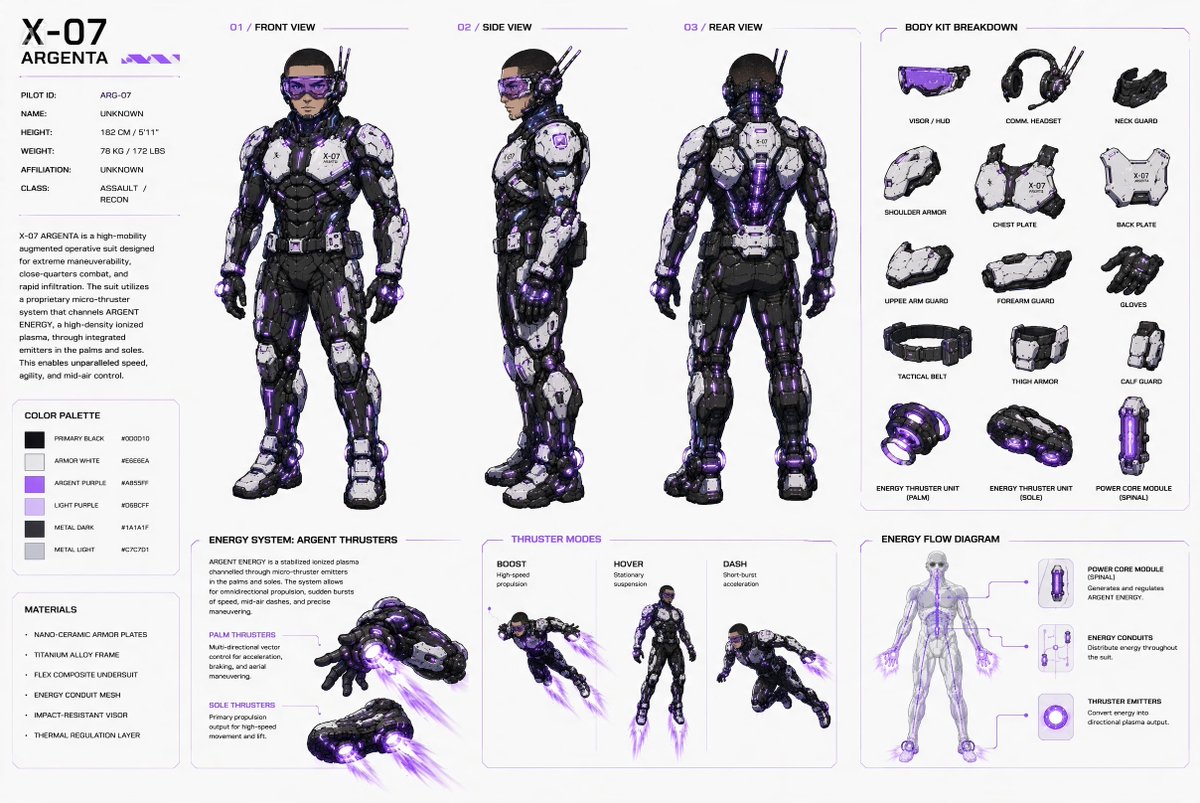
This tutorial explains how to create characters and scenes using GPT Image 2 and Seedance 2.0. Steps include: 1. Create character in free ChatGPT; 2. Make Character Sheet with GPT Image 2; 3. Write prompts including scene description, character actions, and effects.
Prompt
First create the character, you can try using prompts in free ChatGPT. 2. Create a Character Sheet using the GPT Image 2 model, containing Character Details (clothing design, body kit used, abilities, can be added as you wish). 3. Create the prompt, take notes first or type in Google Translate, if still confused about the story sequence, follow my method first (for beginners and those still confused), write down the place you want to use (write details, e.g., Cyberpunk city, many flying sci-fi vehicles, anti-gravity roads, skyscrapers, etc.), then describe what the character does in that place, add SFX & VFX, you can ask a suitable chatbot for what effects to use, once done just copy and ask to organize the rundown using Claude/GPT/Grok, then just translate.
Kynvio Prompt Workflow
How to use this prompt
Open it in Image Studio
Send the prompt to Kynvio AI without starting a generation.
Adapt the details
Replace the subject, setting, colors, text, or composition for your goal.
Review and generate
Choose your final settings, then click Generate when you are ready.
About this prompt
Will opening this prompt spend credits?
No. The button only prefills Image Studio. Credits are used only after you start a generation.
Can I edit the prompt first?
Yes. The transferred text is fully editable before you generate an image.